Pages

Powered by Blogger.

Tuesday, October 28, 2014

1.09 Update - Metal Shield prototype

OK, a quick update on this shield project.


This is the version of this project I completed this weekend, and I made it out of a sheet of galvanized sheet metal I bought at Lowes for less than $10.  I used a circle-cutting jig on my scroll saw (and ruined 4 blades learning how to correctly cut metal with fine-tooth blades), and it assembled in about 2 hours (it would have been quicker if I had more large, tight clamps) after painting.  The red and blue are the normal Krylon from the original bill of materials; the silver is coated with Krylon glossy clear coat which, if I can be honest, isn't very glossy.  Maybe it has a bad reaction to the galvanized metal, but it's very dull.

Anyway, this shield is 22" in diameter since the raw materials are only 24"x 36".  It does not have any spun effects on it because the galvanizing get very dull when it gets scrubbed and buffed.  The star is, frankly, sub-par and not very symmetrical (it was poorly cut).

Also, in spite of using a metal-grade epoxy glue to join the circles, it is very brittle.  I don't have a lot of confidence in the bond lines for anything more than hanging this from my wall.  If I put straps on the back of it to try to carry it around, I thin it would probably fall apart eventually.

So the prototype for a metal version of this project is a mixed bag at best.  I'm not completely disappointed, but there are a lot of lessons learned here before I move over to trying this technique on better-grade aluminum.

Stay Tuned.

Wednesday, September 03, 2014

1.08 Scaling For Height

OK - halloween 2014 is coming up, and a lot of you readers will want to scale the shield for someone who is half-sized or less. Here are some tips:

1. The basic build on this blog is a 28" diameter shield, where the red/white rings are 3" wide and the center has a 10" diameter.  So the full diameter is roughly 9+10+9 = 28".  This ratio is the basic ratio of the shield to keep the blue part the right size.

2.  So for example, if you have a 4' Cap fan at home who needs a shield, Cap is 6' 2".  Your Cap Fan is roughly 65% as tall as Cap, so her shield should be 65% the size of Cap's shield.  That's a shield roughly 18" in diameter, a center circle with a 6.5" diameter, leaving the rings to be about 1.75" wide each.  5.25+6.5+5.25 = 18".  The rest is travelling music.

3. As you build the rings, you can be lazy about the math and simply do it this way: draw the center ring with a diameter that is 0.25" bigger than the final diameter; draw the inner red ring with a flat diameter +1" than its final flexed diameter; draw the white ring at +1.5"; draw the outer ring at +2".

4. You decide how much effort to put into finishing and cost for the paint as this is likely a one-time use item.  But: remember that your little Cap Fan is worth your best effort.

UPDATED:

After some poking around on the web and understanding the math a little better, I have developed a tool for scaling the measurements which should make all of your work really easy.  Take a look at this:


Just input the height of your budding Captain, and the table does all the work for you.

Wednesday, August 06, 2014

1.07 That Harness thing

In the last post, I teased you about my harness, and then I dropped off the face of the earth.  Not very fair, I'm sure, but sadly we all have real lives (I hope) apart from reading and writing this blog. :-)

So you're familiar with this:


Well, this is what mine looks like on the back-side:


Which is to say, I have completed  a back side to this shield which is more than just the seams of glue you get when you follow the basic 1.0 Assembly method.  I'm ashamed to tell you I don;t have measured drawings for that pie plate shape, but since the OD of the shield is 28", the OD of the pie plat is 24", and the OD of the flat part of the pie plate is 18".  When you hold up the pie plate to the assembled shield, you get a little gap between the front and the back along the face of the flat part of the pie plate which, if we were just making this for laughs, can remain unfilled.

However, if you want to create a harness for the shield which can strap on your back, and can catch the shield to walk around with it and then release with a tug, you need to install a round magnet inside the cavity where you can see the worn circle mark in this photo.  The magnet I used as a 65lb 3" magnet from Harbor Freight, and I secured it inside with some foam board cut to size and some hot glue.  The foam board was to set the position positively, and the glue simply keeps the magnet from rattling around.  There is also a magnet 180 degrees from that position in case I put the shield on my back upside down.

What I have on my back looks like this:


The reason this tutorial step was delayed is that I was trying to build a more genuine replica than the one shown in the picture (one made of leather, and which looks like the metal buckle Cap has in TWS).  But: that is taking longer than I expected, so I am posting this to hold you at bay until I can get that right, and showing you the prototype made with a 4" electrical box cover, 4 D rings, and 2 x 1" nylon straps from WAL*MART.  The magnet in the center of this one is a 4" 95lb magnet from harbor Freight, and when it is facing the 65lb magnet, they are pretty tight.

Before assembling this device, however, you need to take the 95lb magnet and position it on the 65 lb magent in such a way that you get the strongest positive lock between them -- the position where the "S" pole of one is lined up to the "N" pole of the other, and the smaller ring is entirely inside the larger ring.  When you find that position, mark the top of the outside magnet with a "T" and the bottom with a "B" to make sure you build your harness rightside up.

Assemble the buckle as shown, and then try it on.

Wednesday, July 16, 2014

1.06 Silver Paint and the Star

Whichever method you used to assemble the rings for your shield, you now have the essential 1.0 Shield build -- which, at the end of the day, looks a lot like the shield in the video which inspired this blog.  You have some basic improvements, I think -- the method for laying down the template on the mat board, the cutting method, and I think my recommendation for silver paint is actually a huge improvement over any other paints you might use because of the color and finish.

However, about that silver paint ...

The cataclysmic drawback of this silver paint is that it has a very deceptive cure time.  In theory, it dries to the touch in about an hour, but if you touch it any time in the next 24 hours, you will undoubtedly leave fingerprints and all manner of smudge marks on it.  In fact, if you tried to assemble your rings at any point prior to about 48 hours of cur time for the silver paint, you were very angry at me for choosing this paint because while it looks very shiny, every touch ruins the shine.

The solution, to be honest, is patience.  It doesn't matter what the cure time on the bottle says: the silver in this paint doesn't set up until at least 48 hours in very dry and temperate (not to say "hot" -- really about 76-78 degrees F) conditions.  The paint on my star didn't dry completely until almost 4 days after I put the last coat of Silver on it.

Anyway, that's my first point: delay mounting the star as long as possible.  The longer you wait, the better the paint will dry, and the less touch-up you'll have to attempt.

My second point is this: the center hole in the star and in the shield will be your friend for this final operation.  Putting a pin or a finishing nail through the center hole will allow you to align the star in the center of the shield, and your work will be almost worry-free.   For best results, orient the star so that the seam in your rings points down and the star points up (if you cut the star right, any point pointing up will do).  The star on my shield is attached with hot glue.


And that's a completed front side of this project -- and a totally suitable 1.0 version of Cap's shield.

Now: for some of you, this is perfectly fine.  You're going to use Duct tape for handles on the back, you'll use it once or twice, and when the tape becomes unattached from the back you'll add more tape until the shield is torn to bits and you have to throw it away.

For the rest of us, we are bother by the fact that the movie Shield looks like this from behind:


Leather-like straps, buckles, reinforced harness.  And, for the truly disturbed, Cap's shield does this:


Right?  In the comics, I think the idea was always that he put his arms through the straps on the shield and wore it like a backpack, but in the movie, plainly he has some kind of harness that allows him to carry it around on his back.

Wouldn't it be awesome if your shield was that detailed?

My shield is.  Stay tuned.


Monday, July 14, 2014

1.05 Front Face Assembly

Great -- we have painted parts now, and you are dying to assemble this thing because SDCC starts in 10 minutes or maybe you are late for the midnight premiere of the next Marvel movie.

Well, I hate it for you because this next step takes about 90 minutes if you have a helper and are extremely competent with hot glue.  Also: you will be very well served if, after all of the previous steps, you set the whole project aside for 24 hours to let the paint not just dry, but to actually cure so that the silver paint doesn't do spectacularly bad things when you touch it.

Anyway, the idea at this point is to assemble the pieces in this way:

CLICK TO ENLARGE

And that seems so obvious, right?  Just stack them up, and away we go.  In the original video instructions, all the pieces are trimmed to fit exactly inside each other, so what are we waiting for?

Well, we are waiting for a couple of details which are not obvious at first glance.  The first one is that the dimensions on this pieces are wider than in the video because this version uses wider bond lines to create a stronger final model.  because we are using these bond lines, we also have the problem I have previously alluded to: when we glue up, we wind up generating a wrinkle as we work around the bond line if we have actually cinched and glued the circles prior to painting.

So this post is going to have two parts: Part One will be what to do if you did what I did and cinched & glued the circles prior to painting.  Part Two will be if you were clever enough to read my extended commentary in Step 2 and you didn't cinch and glue, but only trimmed the circles to prep for cinching, then primed and painted them.

However, by way of intro, there's something about the original movie prop which bears a second look:


Notice that the shield is actually ridged where the color changes ultimately go. This is a very elegant feature of the shield, and any decent replica is going to follow that design somehow.  For us, it's easy because we actually designed the assembly to rely on the ridging to give us a place to glue the parts together.

Method 1: The Original Method

First, don't get anxious about gluing the star down.  It's the last piece to go onto this monstrosity, and you'll be glad you did it that way.  Start with a clean work space -- because you're going to be working with everything face down in this method, and you'll be very happy to avoid all the heartache of random debris on your shop floor scratching up your hard work and nice paint.

For this method of assembly, My recommendation is not to use hot glue. Using hot glue will only cause you one of two heartaches: (1) an inconsistent bond line at the joints which is uneven and not very strong, or (2) if you apply pressure while gluing, you'll get a wrinkle that forms toward the end of your circle which you cannot work out, and you'll have to cut and repair the disk to cut out the extra material.

  1. In the spirit of measure twice, glue once, take the Blue center circle and measure its outer diameter (OD), which ought to be 10-1/2".
  2. Measure the inner diameter (ID) of the smaller Red circle.  If your cuts were accurate and your cinching was serviceable, it should be someplace around 10" even.  However, whatever your ID measures to be, the ID should be smaller than the OD of the Blue disk.  On-Half the difference of the ID and the OD will be your glue flange space.
  3. Measure it to make sure that you have the flange you think you have before you put down any glue.  Measure it in two directions across the center like of the circle.  Mark off guide marks on the inside of the disk in at least 8 places to indicate where the bond line needs to be.
  4. Tape the Blue disk in place with 3 or 4 small pieces of painter's tape or masking tape, using the guide marks to center the blue disk.
  5. Find some old newspaper and cut it into 2" strips which are 6"-8" long.
  6. Take one of these strips and paint on some undiluted glue in a thin layer which covers the whole strip.
    CLICK TO ENLARGE
  7. Apply the strip on the bond line so that the edge of the center disk has paper extending on both sides, and smooth it out so there are no wrinkles.  Repeat until you have covered the whole inner ring, and set aside to dry.  It should dry in about 2 hours.


While you are waiting for that assembly to dry, do the same thing with the outer red ring and the white/silver ring -- verify the I.D. of the larger ring and the O.D. of the smaller ring, mark the bond line on the large ring with guide marks, set the smaller ring in the larger ring according to the guide marks, and tape it up to keep it centered.  You may find that you will need to drop the whole assembly into a laundry basket or large trash can so the smaller ring can hang out of the larger ring as you glue it up.  Repeat the process of applying glue strips to the bond line here are you did on the smaller assembly.  Let the whole thing dry.

Last, repeat this process by putting the smaller assembly inside the larger assembly.  Mark the I.D. with guide marks, tape up the smaller assembly to make sure it's centered, and apply the glue strips.

When the glue strips dry, you will have the essential Shield 1.0 Model  nearly complete.

Method 2: The Better Method

When I attempted Method 1, I made two significant mistakes: (1) I used diluted glue, which was too wet for the application, and it cause a LOT of water damage to the model, and (2) I gave up on the glue strips method, and took up my hot glue gun.  As I have said several times in this series, using hot glue on the cinched circles cause a wrinkle I couldn't work out except by cutting out the wrinkle at the closed end of the circles.

When I finished, I realized that the better method would have been to leave the circles unglued after making my cinch marks.  I could prime and paint the circles, close the cinched up area with a large paper clip, and do my bond line gluing with hot glue.
  1. In the spirit of measure twice, glue once, take the Blue center circle and measure its outer diameter (OD), which ought to be 10-1/2".
  2. Measure the inner diameter (ID) of the smaller Red circle.  If your cuts were accurate and your cinching was serviceable, it should be someplace around 10" even.  However, whatever your ID measures to be, the ID should be smaller than the OD of the Blue disk.  On-Half the difference of the ID and the OD will be your glue flange space.
  3. Measure it to make sure that you have the flange you think you have before you put down any glue.  Measure it in two directions across the center like of the circle.  Mark off guide marks on the inside of the disk in at least 8 places to indicate where the bond line needs to be.
  4. Begin gluing small sections of the bond line from the square end of the Red ring.  Wherever you start this ring, that seam will be where you start all the rings. With hot glue, squeeze out 3"-4" of glue in the bond line, compress the bond line for a tight and even seal for about 30 seconds, and then move to the next few inches.
  5. Keep a close eye on your guide marks so that you aren't migrating in or out, and your red disk is maintaining its correct shape.  By the time you have glued half-way around the disk, you may find you will need to work the wrinkle out of the unglued side by adjusting the paper clip -- and that's fine.  Just make sure you are, again, minding your guide lines.
  6. When you reach the end and you have overhang, trim the overhang with your utility knife to match the starting edge, finish the interior bond line, and then patch the ends from behind with a piece of scrap mat board.
In the previous method, you assembled the inner assembly, then the outer assembly, then dropped the smaller into the larger.  That won't work using this method.  Because each ring needs to be adjustable as you glue it down, you can't have the outer ring constraining the silver/white ring.  After you finish the inner red, repeat the process on the white/silver ring, starting the seam in the same place as the first ring.  When you complete that ring, repeat with the outer red ring.

Friday, July 11, 2014

1.04 Painting Paper Parts

OK: so we have cut our circles, and we have prepared them for painting.  Because my personal journey as a model builder/prop builder hobbyist has wasted a lot of time learning how to properly paint things -- especially things intended to look like leather or shiny metal -- I wanted to make one post for those of you who are new to this process so that you do not replicate the mistakes of my youth.

The first tip is that you need to go back and re-read my instructions on priming the paper parts with thinned-out wood glue.  Without any exaggeration, there is simply no other way to make a paper part ready to receive enamel paint except to have it adequately primed, and the only method I have found to do this is with the waterproof wood glue mixture recommended in that post.  The only thing you have to be careful of is overcoating the paper so that the glue isn't flaking off after it dries.  You want the glue to saturate the surface of the paper, dry with a water-resistant seal, and also not cause the paper to buckle or warp.

The second thing you need to paint well at this scale is one of these:


Personally, I don't care about the brand you use -- they are all about the same thing.  I prefer one like the item pictured above as it has an open space around the spray can nozzle rather than a closed dome.  But the point of using one of these is to have proper control of your spraying, which the classic single-finger technique for spraying from a can simply doesn't give you.

YOU SEE WHAT I'M SAYING?
Next, you need to master how to use the trigger for even coating.  The key to spray painting is using as little paint as possible while also using enough to get a fully-covered surface.  You accomplish this by spraying lightly and quickly over the area to be painted, using strokes in the same direction.  There are about 100 videos on YouTube for painting technique, but this one from Ace Hardware, frankly, is brief and the most helpful.
CLICK IMAGE TO JUMP TO VIDEO
Also, I cannot stress this enough: when you use any spray paint, SHAKE WELL BEFORE USING.  The standard line is, "shake for 60 seconds before spraying," but most people simply have no idea how to shake well and thoroughly, or how long 60 seconds is.  When you pick up the can, hold the can at the top with the cap in place.  Take the can and wave the bottom of the can until you hear that rattling noise.  That sound is a large bearing which is dropped in the can to assist you in mixing the paint well.  When you wave the can, the bearing will start to wander around the inside of the can, and now you're ready to shake well.  To get a good shake on, grasp the can with two hands, and shake it at least the distance of the height of the can up and down.  You will have a good shake on when you are shaking at 4 shakes per second.  Until you are confident in your ability to count to 60 at the right pace, use a timer to let yourself know when you're done shaking.

Now: why the kindergarten primer on how to shake a can?  Well, because spray paint is not some magic liquid: it is a chemical mixture of pigment, a solvent (and other balancing chemicals) which is the evaporating medium that carries the pigment to the object and assists in curing the pigment to the object, and a propellant which is what causes the mixture to fly out of the nozzle.  In order for you to use it properly, you need to get the mixture coming out of the can as close to what the chemist who refined this stuff intended as possible.

Before you start spraying, CLEAN THE AREA YOU ARE SPRAYING IN; wipe down the parts with a damp cloth to remove all dust.  Every hair in the air will immediately cling to damp paint.  Every stray dead leaf of grass will fly toward your project like a lemming trying to hurl itself over the precipice of your hard work.  Every grain of dust has waited since the beginning of time to fly onto the paint on your project in order to make it look like sandpaper instead of coated Vibranium, and your job is to remove them all from your work space before you start painting.

Also: it is easy to want to paint as soon as possible, but every paint has a temperature range recommended for application.  If you apply it when it is too cold, your paint will take too long to dry and it will puddle or run.  If you apply it when it is too hot, it may not stick at all as the solvent evaporates too quickly.  If you apply it when it is too humid, you may actually get paint taffy which will never dry but will always be sticking to something -- like hair, grass and dust (or worse: your costume).  Pick a time and place where you have the right temperature and humidity.

Last: as you spray, cross the painted surface in ONE DIRECTION ONLY.  The best result in this case comes from painting in strokes from the center of the circle out past the outside of the circle.  When you have painted as much as you can reach, move to the next section.  Work hard not to overspray because every drop of paint you overspray will be a teardrop of regret your shield will always wear.

When I painted mine, I painted a thin base coat of Silver, and then two coats of Color on the Colored parts.  The silver parts got 3 coats of silver, and when finished before assembly they were as shiny as the shiny side of tin foil.


Thursday, July 10, 2014

1.03 From 2D to 3D

Last time we left you with these parts and pieces:

CLICK TO ENLARGE
Which doesn't really look like much.  In fact, there are probably 2-dozen Shield building tutorials on-line which would leave you with these pieces, all flat and saggy, to tape or paste them together and you get what you get.

However, in the really brilliant video I linked to when we kicked off this blog, the designer of the original shield model understood that a flat shield is lame, and he also understood something about how paper can work structurally.  In this step, I'm going to show you what we did to build the original 1.0 model shield, and then at the end of this step I'm going to tell you how to do one better that we did using the same materials and a better technique.

OK: so a bunch of flat paper stacked up on itself will look like this:

NO OFFENSE, KID

Right?  Just circles on a disk.  And that's fine when it's 1974 and all you have at your disposal is a refrigerator box, watercolor markers, a steak knife, and a tattered copy of Cap #111.  But we have all of the fire power of being middle-class nerds in 2014 who understand that it really doesn't cost that much to transform those paper disks into something a little more dimensional.

The real thing, which was allegedly turned out of aluminum, looks like this:


Which of course is fantastic.  But if we are marginally clever, we can see that we don't have to make the surface of the shield one continuous curve.  We can actually build it like this:

CLICK TO ENLARGE

Which is really a stack of straight lines, each one as you move out from the center set at a more-steep angle.  The way we get that steeper angle is to take the pre-cut circle and tighten it up.  You saw that in the videos, and I'm going to show you the way we did it in the original shield model, but at the end I'm also going to tell you a different method which, I think, will render a result even better than what we got in our first try.

Let's begin with the largest circle, which is the outer red circle of the shield.  Take the utility knife and the yard stick, and cut the circle on the centerline marking left over from when you measured the board ON ONE SIDE ONLY.

CLICK TO ENLARGE
A neat, straight cut is your best friend.  Next, lay the yardstick down and place the circle over it.  Have a helper keep the uncut end of the circle at the center mark on the "zero"end of the yardstick, and you begin to cinch up the circle, overlapping the cut ends on top of each other until your outer diameter (OD) is 28".  When you have that diameter, your circle will no longer be a flat piece: it will have a very distinct slope.  Mark the place where the top overlapping piece ends for reference, and then break out the glue and the clamps.

CLICK TO ENLARGE
If you use this method, make sure when you clamp you are getting good bond lines (right to the edges) on the inner diameter (ID) and outer diameter (OD).  Above, on the left, the clamps are allowing the outer diameter to gap, and if it dries that way you'll be stuck with a lousy appearance.  On the right, above, the clamps are getting good pressure without marking the paper, and the edges are all sealed.

You want to repeat this process on all 3 outer circles.  You're going to draw the middle (white) circle in so the OD is 22.5"; the inner (red) circle gets drawn in so the OD is 14.5".  When you do this, the three circles will each have a different slope.

When the glue sets up under the clamps, take the waterproof wood glue and mix 4 parts glue to 1 part water (not an exact recipe - just don't mix it with more water than glue).  Mix it well so it is very runny, very smooth.  Paint the tops of the rings, the center circle, and the star with the watered down glue.  This mixture will take about 1 hours to dry in a sunny place, or about 3 hours to dry indoors.  When it sets up, your rings will be ready to take paint.

We'll talk about painting in the next blog post, but here at the end of this one, I wanted to talk about the method above, and what I think is a better method for cinching the circles.  The method above gets your circles closed and cinched in a very satisfying way.  When it's done, you have parts that look like they are ready for either paint or assembly, and you feel like you've made progress.

The problem with this method is that when you go to attach the rings in a stack, your process of gluing will cause you to find a lot of slack in the difference between the OD of the smaller ring and the ID of the larger ring around your glue joint.  Because the larger circle is already closed and sealed in a cinched position, you'll get a wrinkle in the last 4 inches of your bond line which you can't work out.

The way I solved this issue in my shield was to cut the circle a second time at the overlapping flap when I had come all the way around the bond line with hot glue, cut out exactly enough paper to eliminate the wrinkle, and then re-attach the loose end by gluing a patch on the back side of the shield.

After thinking about it, I think the better way to approach this situation is this:
  1. Cut the circles on the center lines as above.
  2. Cinch them up to the correct OD and mark the overlap with a straight line.
  3. DO NOT GLUE THE OVERLAP.  Instead, CUT the overlap at your mark.
  4. Prime the circles after cutting is complete, as above.
  5. Paint the circles (we'll discuss next time).
  6. Assemble the circles starting from the center going out; glue the bond lines from the inside of the shield, working in one direction.  When you have 4-6 inches of bond line left, mark the new section of overlap and trim the loose end to meet exactly at the starting point.
  7. Complete the bond line and glue the cut ends together from behind using a small piece of scrap. Cover the whole seam for best strength.
  8. Repeat until all rings are installed.
This method eliminates the overlapping glue flap on the circles, and makes the actual bond line between ID and OD of each circle more precise.  If you are careful, and you start each circle at the same place, your glued ends could likely be filled, sanded, and repainted -- and it will eliminate the crease mark which my model has on the front face.


Tuesday, July 08, 2014

1.02 Mark Up your Materials

Welcome back.  If you have completed your shopping, the next part is all prep -- and you know what they say: measure twice, cut once.

One of the benefits of this build is that the cutting is actually rather simple -- 4 circles and a star.  When you have the right tools for the materials you are using, this won't take more than an hour.

In the Bill of Materials post, we noted that you needed to drill a pilot hole for a tack at at the 1" mark.  This is probably the most important prep step for your tools because this hole creates the center mark for your compass.  If you have that hole too wide, or off center, or in the wrong place, the rest of your circles will be sloppy at best, or very uneven at worst.

Before we cut anything, let's look at the measured drawing of the mat board:

CLICK TO ENLARGE

We're not building to machine tolerances here, so we're only marked up to the nearest quarter-inch.  But before you mark anything, you have to get your marking tool set up, and that means drilling the pilot holes in your marking tool according to this drawing.  Notice that all the measures are of the radius, not the circumference -- that's because these will be the marking holes you make in the tool.  For those who are new to this sort of stuff, that means drilling holes in the compass at these marks: 6", 6-3/4", 7", 9-3/4", 10", 12-3/4", 13", 16".  See: if the center of your compass sits at the 1" hash mark on the ruler, all the other points have to be relative to that center mark -- so the radius of 5" is measured by the pooint on your ruler of 6" (6" - 1" = 5").

If you use a simple 1/8" bit, the holes should be wide enough for just the tip of your pencil to slip in and mark the board.

Before you drop the compass down on the mat board the first time, measure the board on the short edge and put down a hash mark at the midpoint.  Then measure the distance of that hash mark down the log side of the board so you can create a point in the middle of the board toward one end.  The point here is to leave as much scrap at the bottom of the board as possible. (we will need it in future versions of the project).

CLICK TO ENLARGE

Once you have the middle point marked, drop your compass in and draw the circles on the first board as noted in the measured drawing.  Repeat the marking process for the second board, but trace out the circles from the second board in the drawing.

CLICK TO ENLARGE

Before we start cutting, we need to trace out the star for the center of the shield, and as the measured drawing shows you, you'll do that on the first board which has the small 5" circle on it.

This may sound ridiculous to the real builders out there, but to make the star you need a protractor.  Some of you are clever enough to make it with the compass, but we don't want this project to wash out anyone who failed engineering drawing in trade school.  An American star has 5 points, all points the same distance from each other.  If we're drawing it inside a circle, that means that each point is 72° away from its two neighbors.

CLICK TO ENLARGE
The final prep step is to put some sort of cutting surface under your mat boards to ensure your cuts will go all the way through the board, and not mark the floor under your cuts.  I used a scrap piece of mat board underneath.  If you cut these pieces on your Mom's linoleum or your hard wood floor, you will mark up the floor and you are taking your life into your own hands.  Remember: Frank said to put something under the boards you are cutting to avoid this problem.  My homeowner's insurance does not cover your lack of caution.

Next we can start cutting, but we're not free-hand cutters at this blog.  We want not to cut ourselves, but we definitely want to cut out circles.  That's where this crazy wooden compass serves a double duty.  To use it, first put on some safety glasses and ...

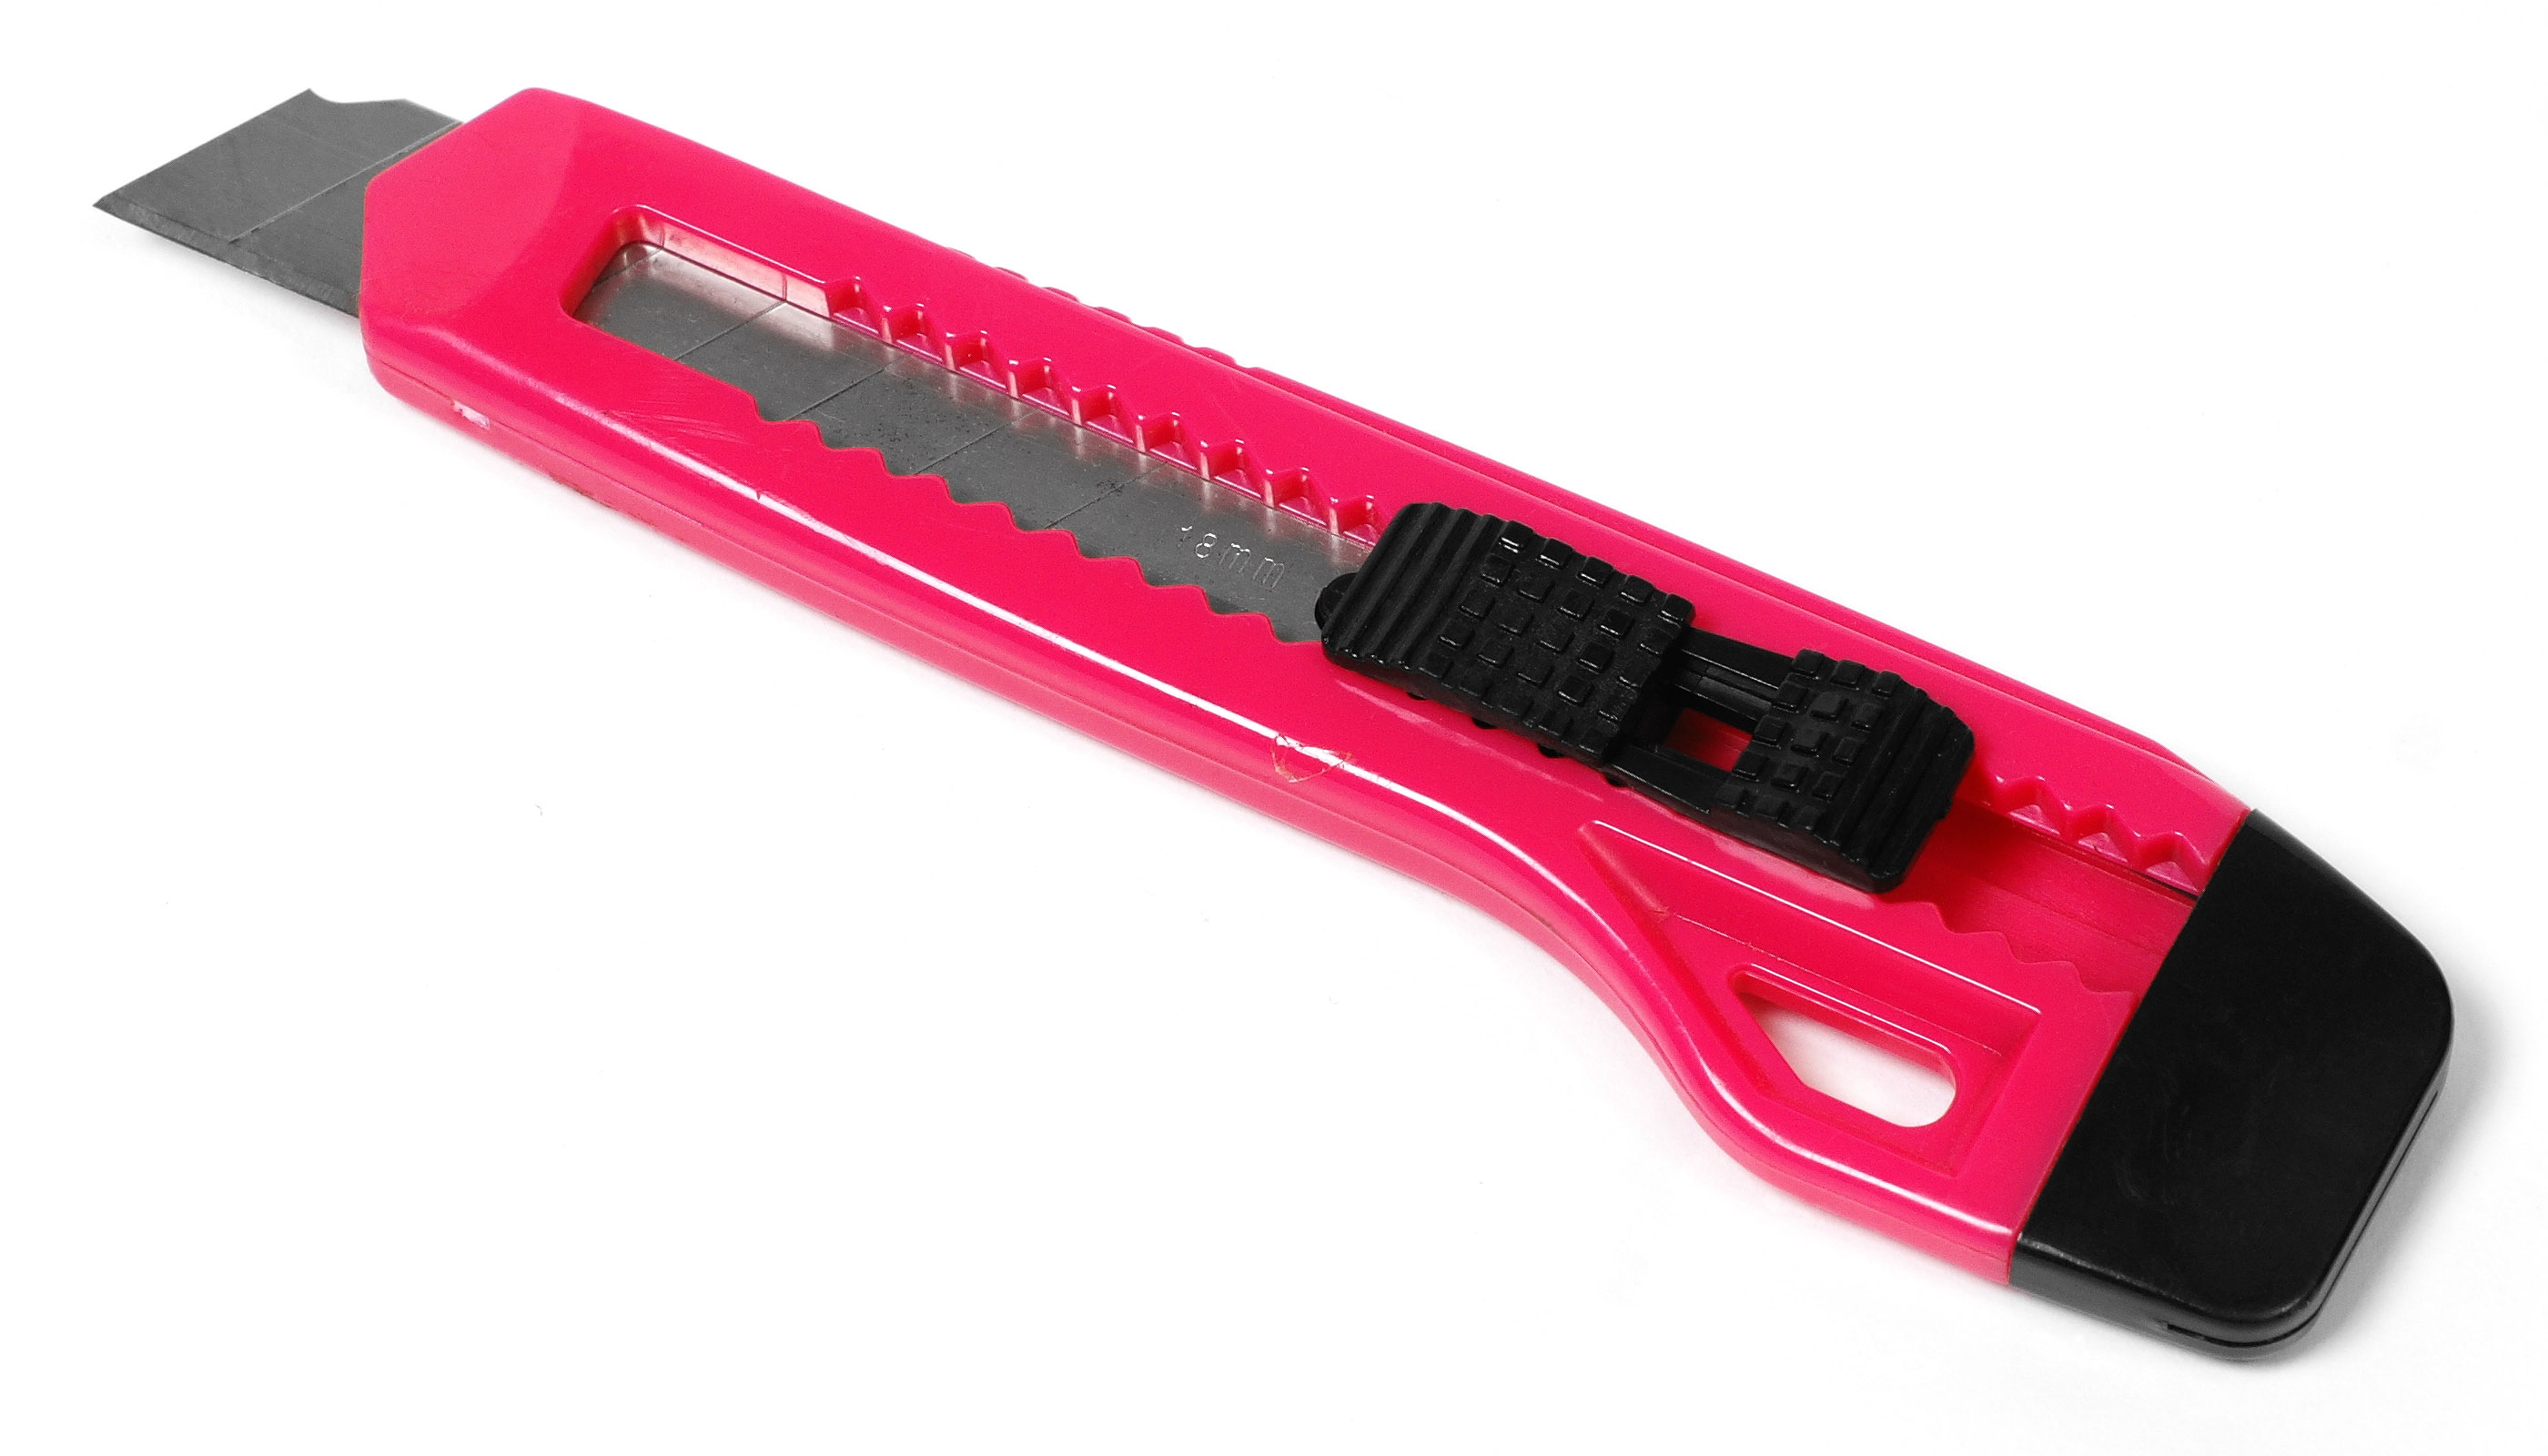
SAFETY TIP: if you do NOT want to cut yourself, follow my instructions below to get a sharp tip on your utility knife.  If you CANNOT follow those instructions, or DO NOT READ THEM, you will cut yourself, and that will be your own fault.  I can;t stop you from using tools the wrong way, and this is my warning to you: if you don't snap the tip the right way, you will hurt yourself.  EXERCISE CAUTION WITH SHARP TOOLS.

... take your utility knife in your left hand.  Take a pair or reliable pliers in your right hand.  Set the blade to extend so that the first scored mark is lined up with the edge of the handle.  While holding the tip of the knife with the pair of pliers, bend the blade at the scored mark.  Crack off the old tip along the scored mark to give yourself a new, sharp tip.  Dispose of the shard of blade safely and immediately so out don't step on it or worse.

Now make sure the center of your compass is set correctly, and set your knife on the measured mark of the ruler corresponding to the widest-radius mark on the board.  Press down firmly so the tip of your knife bites into the paper, and the edge of your knife bites into the wooden ruler.  If you set the blade properly, you can simply pull the blade along your guide mark and the compass will assist you by keeping the blade at the correct point on the circle's circumference.

CLICK TO ENLARGE
Pull the blade toward the ruler, on the guide mark, and press down at the same time,  You may need a helper to hold the center pin of the compass in place as you cut, and you may need to make more than one pass to cut all the way through the mat board.

CLICK TO ENLARGE
Continue for each guide line until you have something left which looks like this:

CLICK TO ENLARGE
Those of you who are still with us and not dreaming of other things will notice that this picture has some circles on the right which are not in the measured drawing.  We'll come back to those a long way down the road.  When you are done, you should have the 4 circles on the left, plus a circle with a star traced on the center.

One last thing: I think this method is a massive improvement over the one from the video which inspired this build for two reasons: you don't have to puzzle the template together from a bunch of printed pages, and the problem of gluing down template pieces in order to make your cuts is eliminated.  This first step can be completed in less than an hour if you are anywhere near handy with the knife and the compass.

Monday, July 07, 2014

1.01 Shield Build 1.0 Bill of Materials

To build this project, you need a few things.  Where it's possible, I have listed the prices of the parts and pieces.
  • 3 sheets, plain white mat board 30" x 40" (~ 762mm x 1012 mm) (about $7 each)
  • 1 can, Krylon ColorMaster Cherry Red Paint (buy the darker red, not the jolly red) (about $6)
  • 1 can, Krylon ColorMaster Navy Blue Paint (I used "true blue," but I think a navy would have been better) (about $6)
  • 2 cans, Krylon clear coat spray (I bought double coat from WAL*MARt at about $5 a can)
  • 2 cans, Krylon Silver Foil Metallic spray paint (about $7 per can)
    • NOTE: this makes fantastic Silver parts which cannot be touched ever again without leaving fingerpirnts.  You can substitute Krylon ColorMaster White if you want a shield which is a little more real-world friendly.
For the "advanced" version of this project which builds a back-side to the shield, complete with durable handles and the harness which Cap wears in "Winter Soldier" to wear the shield on his back, you'll need the following:
  • 2 leftover wire hangers from your dry cleaning
  • 10 wide-head assembly screws with nuts and large washers
  • 1 2-pack, velcro elastic straps (about $8 at WAL*MART)
  • 2 1-inch x 3 ft camping straps (about $2 each at WalMart)
  • 1 2-pack 65-lb magnets; 1 95 lb magnet (about $15 total from Harbor Freight)
Tools you will need:
  • 1 sharp pencil
  • 1 1-inch wide tempera paint brush (suitable for applying glue; about $4 at WAL*MART)
  • 1 wooden yard stick trimmed back to 16" and a large thumbtack
  • A simple classroom protractor
  • A metal yardstick
  • Drill or Drill Press
  • utility knife (pref: the kind which lets you snap off the end to get the tip sharp again, as below)

  • Waterproof wood glue (if you have saintly patience and a truck box full of clamps; also used for priming the paper before painting)

  • Hot Glue Gun with 24 glue sticks (if you are like me and have no patience for drying glue, but you need a very precise touch)
For the board, you can buy a cheaper (thinner) stock which will be easier to cut, but it will not be as structurally tough at the end of assembly.  You can choose a cheaper paint, but cheaper paint on paper doesn't have a consistent finish.  Judge your own proficiency with the glue -- I used a ton of glue, but my joints are very wide.  If you are a very fancy model maker, and you can make a drop of glue suspend a bag of groceries from a toothpick, may it be a blessing on you.

Before you get started, prepare the yard stick to be your compass by drilling a tiny pilot hole at 1" exactly to receive the thumbtack.  If you are especially clever, you can pre-drill the stick for the holes you will need to trace the circles on the mat board prior to cutting.

Credit where Credit is due

The inspiration for our Cap Shield came for these two videos.  The materials and processes in these videos are slightly different than ours, but it would be wrong to say we invented our version without any help.

Enjoy these videos!


Contact Us - We Love E-Mail!

Name

Email *

Message *